Austin and I spent a couple of hours this afternoon during his Christmas break doing some odds and ends. He's a real trooper 'cause this kind of stuff is boring for a kid his age. I handed him some Eastwood Rust Encapsulator and had him topcoat the firewall and underdash area that I had previously treated with a rust converter (for mild surface rust). This will seal it and give it a uniform appearace. We're still cleaning paint out of Austin's hair.
Austin applies Eastwood Rust Encapsulator
Meanwhile, I removed the e-brake assembly and cable, finished the resto on the AM Radio, and repaired some broken plastic tabs on a couple of the dash bezels.
AM radio ready to go back in
To repair the plastic tabs I'm trying a product I hadn't used before called, Rapid Fix. It's basically a super glue with a powder filler. It works very fast and seems to create a strong repair. We'll see how it holds up but so far I'm favorably impressed. It's similar to another product called Plasti-Fix which I used on my Duster project. I can't say yet which one I like better. You can get a better than website price on the Rapid Fix by shopping around.
In this case I created a dam with tape and then began alternately applying powder and glue to build it up. After it cured I was able to easily grind it to the shape I wanted with a 2" Roloc disc.
Decided to blow the steering column apart since I needed to get the floor mounting plate off and trace for a seal. It was fairly straightforward and actually a little simpler than the one in my Duster. 'Course, someone's been inside already and messed up the steering wheel and horn mechanism.
So what's it take to disassemble one? Not much. After removing the horn pad (which was taped on and missing parts under the pad) I simply removed the wheel nut and used a puller to remove the wheel. One screw and the turn signal lever is out. Remove a snap ring and the main shaft slides out. 3 screws and the switch comes out along with some springs and other miscellaneous parts. Drive the pin out that holds the shift lever in place. There is a set screw that secures the shift tube to the upper assembly. Once all this is off the only thing preventing the shift tube from coming out is the little shift indicator bracket.
The bracket is secured to the tube with two nylon rivets. I presume they used nylon so that in the event of a massive crash it would shear off just as the steering shaft, shift tube, and column housing are designed to collapse - rather than impale you.
I took a punch and pushed the little pins through and the bracket popped off. The nice thing is they should be reuseable.
Reuseable nylon rivet hold the shift pointer bracket to the shift tube. Once the bracket is off the tube will slide out.
Like most stuff on this dash, the A/C Heater controls were really fubered. The vacuum switch was physically broken and my attempts to disassemble and repair it failed. It worked better than before but just didn't operate smoothly enough to reuse. If you've never been inside of one, they're pretty interesting. You can still buy them new from the local parts stores but fortunately I had one from a donor.
A guy in the neighborhood has a '71 Dodge Polara parked next to his house that he plans to demolition derby next summer. It was in pretty good shape and it's a shame, really, to waste a perfectly good car. But since he plans on gutting everything and literally throwing it away he let me salvage parts from it for free. (When he's done destroying it I'm welcome to salvage the drive train). I pulled most of the dash and the heater control has the same vacuum switch as my original. It works very smoothly so I swapped it in.
Swapped in a vacuum switch from donor
The heater blower switch was siezed. There were obvious signs of overheating and when I opened it to see if I could salvage it, it crumbled apart. Most of the wiring in the heater related circuits show signs of too much current flow at some point. I don't know what someone was doing but would explain, in part, why the dash is such a mess. In any case, since the Polara switch is different , I had to replace it with a new one.
Original switch is toast
With some touch-up with a silver paint pen, the A/C Heater controls look like new again and should actually work now.
They say you shouldn't buy a car a built on a Monday or a Friday. Monday, because workers are hung over from a weekend of imbibing and Friday's because they can't wait to get out of there to start drinking. I don't know what day of the week this old girl was assembled. I'll have to figure it out sometime. But, I have to wonder if it was a Monday or a Friday. More on that in a minute.
When these cars were built they weren't fully dipped or primed like today's cars. A lot of metal is exposed and the upper part of the firewall behind the dash is no exception. Several weeks ago I treated the surface rust on the inside of the firewall with some Duro Extend rust converter. It did a good job of converting the rust to a black iron phosphate. Normally I would have used some Ospho but I had the Extend sitting around so I thought I'd try it.
I planned on topcoating it for a uniform look and extra protection with some Eastwood Rust Encapsulator. (I'm also a big fan of Zero Rust which is very similar). But there were a couple of things to take care of first.
The cardboard and fiberglass firewall insulation was in tough shape when I removed it. I really don't want to put it back in. There are some modern heat/sound insulation materials available today that are a better option. I've used RAAMmat BXT in the past which is like Dynamat but a lot less expensive and every bit as good or better. Problem is, large black nylon push pins secure the insulation to the firewall. Eliminating it would leave dimpled holes. So, I hammer and dollied the dimples flat and welded the holes shut.
Welded up the dash insulation holes
The other issue involved the area of the firewall where the Heater/AC box is mounted. Some "hack" has been into the box before which doesn't help matters, but that's another story. The fiberglass is full of cracks around the mounting points and two of the lower mounting studs were broken off. Fortunately, they were still there. Upon closer inspection I found the firewall wasn't flat where it should be.
Seems when they were spot welding this piece in at the factory, somebody jumped the gun on the trigger before it was in the correct position. A few of the welds on the seam missed the toe board altogether. They must have pushed the end into place to finish it off and just let it go.
Firewall pooches out at this seam.
With the globs of seam sealer removed on the inside you can see the dramatic difference. This defect not only made sealing the box to the firewall difficult but put damaging stress on the fiberglass when it was tightened down.
Pooched wall is hard on fiberglass heater box
Another curious find were two small tears in the toe board just below the seam in the same area. They were partially obscured with seam sealer but one hole had daylight shining through it. I'm quite certain it left the factory this way and didn't occur later. I welded them up.
I was afraid I was going to have to drill out several spot welds in order to push the panel in where it belongs. But since it wasn't really welded at all I only had to separate one weld then use a chisel and small sledge in the corner bend to persuade the metal back. A little hammer/dolly work, a couple of spot welds, and the area is reasonably flat as it should be. The heater box will be much happier. I know I am. Built on a Monday or Friday? Maybe. But fast and sloppy back then was the name of the game.
Nice and flat now. The notch in the seam is factory. This is the area they missed with the welder.
The gauge cluster has a quaint little printed circuit board on the back. All four pins on mine were loose. Loose pins can cause all kinds of problems with your instruments. The pins are simply swaged on the back of board and it doesn't take much connecting or disconnecting of the plug to loosen them. Some of the swaging was missing and when I attempted to re-swage others, the metal fell off. As you can see in the pic below there isn't much left.
Not much keeping these PCB pins secure
I lightly media blasted the connections on the board to remove corrosion. Very fine sandpaper would be safer but this way I was able to get into the nooks and crannies and clean the female terminals. A dab of flux applied with a toothpick at the base of each pin followed by some solder re-established a good electrical connection and firmed them up. Glue on the back side added strength.
Solder re-establishes a good electrical connection to the PCB foil traces
I finished assembling the very basic gauge cluster, tested continuity, made sure there were no shorts, and bench tested the fuel gauge. Good to go. I think there are more idiot lights than gauges in these things. Next up: Dash switches and heater control.
By the way, the mechanical voltage limiter on the back of these panels can be a source of gauge trouble too. Mine works but I may replace it. I've made my own solid state version in the past and there are companies that sell electronic versions as well. I ran across this a company called Real Time Engineering that makes one of the most sophisticated ones I've seen. Not cheap but might be worth checking out.
In the last post I started the cluster resto by stripping the old finish and someone's "paint job" from the bezel with a water based graffiti remover.
I disassembled my original cluster the donor to compare the pieces and select the best parts to build one good one.
Warm, soapy water removed most caked on grime
After washing both lenses to remove some serious dirt and grime I found my clear lens had some light stress cracks in the face. Some knucklehead felt compelled to push on the lens wherever a gauge was located. The donor lens had some deeper scratches.
Cluster lens looking like new
With a little spit, some 2000 grit sandpaper, and a soft buff wheel with plastic rouge I was able to bring the donor lens back to like-new condition. I had to touch up the white paint of one letter on the back side of the lens. You can do it all by hand but the buff wheel makes quick work of it and takes care of flaws that are difficult to remove by hand. You just have to be careful because you can burn the plastic if you apply too much pressure or hold it in one spot too long. I happened to have a Novus 3 part plastic resto kit which I used to do final polishing on the lens by hand. There are several products for polishing plastic available at your local auto parts store. Some work better than others.
Novus Plastic Polish System
The face of the donor speedo was in slightly better condition than my original so I removed the odometer and tripodometer and transferred them. Remove two small screws and each tumbler drops out as an assembly. I also reset the odometer back to zero. It was a bit like a Rubik's cube but once I figured it out it was easy - much harder to describe. It did involve rotating the tumblers starting on the left. Before someone screams, "You broke the law!" I'll add that here in Washington, due to it's age, speedometer readings are exempt and I have no intention of passing this car off as a low mileage original. I just want to start the clock over when it's reborn.
I synchronized the tripodometer to the odometer so that it advances at the right time. This was easy enough to do by rolling the "tenths" tumbler on the tripodometer by hand without disassembling it. I hooked a drill up to the old speedo cable to test everything.
Along with way someone decided to do a color change on this old girl. Car was orginally gold on gold. When they painted the exterior red someone went crazy with black dye or spray paint on the interior. Since the plasticizers in '69-'71 dash pads are known to come to the surface and create a sticky goo you can imagine what happened when they painted it. Yup, we have a black sticky goo covering everything. It's like tar in spots. Flat black spray paint also coats the plastic bezels, including the raised lettering, with a generous amount of overspray on the switches and clear lenses. What a mess!
I picked up a cluster/bezel on ebay that was described as one of the best original speciman's the seller had ever seen - better than most he had seen at car shows. Silly me.
Seller thought this was better than most he'd seen at car shows. Hmmm, really?
Fortunately, UPS broke it in shipping so I got my money back and rather than throw it away it became a donor for a few select parts.
Anyway, back to stripping. Lacquer thinner does a decent job of dissolving dried spray paint but it can also attack some types of plastic. No problem on the dash pad and useable on the vacuum plated bezel if done carefully but it will cloud clear lenses. Also, at $15+ per gallon it can get expensive. I think I've found something better. I found a product at Lowes called Motsenbocker's Lift Off 4 - Spray Paint/Graffiti Remover. It's water based, biodegradable, and contains no nasty solvents. While I'm certainly no tree hugger the stuff works surprisingly well and is easy on the nose and skin. It dissolved all the paint right down to the vacuum plating which I wiped off with paper towels after multiple applications. Should work on the dash pad too.
I'm familiar with electrolysis for rust removal but have never actually tried it. So, after pulling the super-crusty HP manifolds from the engine I decided to give it a try. If you have a media blast cabinet (which I do) I think you'll find blasting faster and, in some case, more effective than electrolysis but it does have it's place.
Your electrodes consist of the part to be cleaned (cathode) and a sacrificial anode. In this case I used pieces of steel rebar because it's really cheap. Sheets of metal or scap iron will work too. Stainless steel is not recommended (though it stays cleaner and lasts longer) because it creates toxic waste. You'll also need a power supply. In this case I used a battery charger set at 35 amps. Smaller chargers in the 2-6 amp range will work too but might take a little longer to do the job.
The final piece of the puzzle is the water solution. You'll need sodium carbonate - more commonly known as Washing Soda. Baking soda is sodium bicarbonate and is similar but the not same. Since washing soda can be hard to find you can do what I did and go to a pool/spa supply and pick up a package of 100% sodium carbonate for a few dollars. By the way, you can also make it by placing baking soda on a tray in your oven and baking it at 300 degrees for an hour or so to drive away water and CO2 molecules - converting it to washing soda. At temperatures above 300o Fahrenheit (149o Celsius), baking soda decomposes into sodium carbonate, water, and carbon dioxide - but I digress. 1/3 to 1/2 cup of soda for every 5 gallons of water will do. More soda will not make the process work better.
My basic setup
Electrolysis is s line of sight process so your sacrificial electrodes should be placed around the part to be de-rusted. They need to be tied together electrically. You can tie them altogether with copper wire. I tack welded a coat hanger to the ends which not only joins them electrically but helped hold them in place. Your container can be anything large enough to accomodate your part(s). Plastic is recommended for a host of reasons. Make sure the part to be cleaned does not touch your electrodes or you'll create a short which will kill the process and possibly your charger.
Connect the POSITIVE cable to your electrode grid and the NEGATIVE cable to the part to be cleaned. Get the cables reversed and you'll get the opposite result than the one intended: your part will be sacrificed and your electrodes will be derusted. The nice thing about the process is you can't overdo it. You could leave your part in for days with no ill effect.
Now, once everything is properly connected, turn the charger on and you'll see champagne style bubbles form off the surface of electrodes and your piece. A few hours later (or overnight) and theoretically your rust will be removed leaving behind an inert black oxide coating. This film can be removed under fresh water with the help of a wire brush.
I got fair results on an exhaust manifold which had a lot of surface rust. The manifold was too big to fit in my 5 gal. bucket so I had to turn it. When I turned it I decided to add sodium hydroxide (lye) to the mix to see if it would work any better. I think it improved the process considerably BUT you're creating a nastier and potentially more dangerous water solution by doing do. Drano Kitchen Crystals is a good source of lye. Proceed at your own risk, however. If you burn your skin, put an eye out, or otherwise poison yourself, you're on your own.
Derusting a battery tray brace worked really well. In the picture below, the right end of the manifold spent time in the soda/lye solution, while the left side got soda only.
"De-rusted" battery tray brace and exhaust manifold
SAFETY PRECAUTIONS: Use rubber gloves and face protection - especially if you introduce lye to the mix. The process also gives off hydrogen gas (that's what those bubbles are) so do it outside or in a well ventilated area. Hydrogen gas is potentially explosive. The wash soda only solution can safely be poured on your lawn or down the drain without any environmental concern.
For more detailed information on the process with additional links click here.
We pulled the windshield and began stripping everything off the firewall and cowl. Someone has replaced the windshield in the past. Instead of gluing it in they installed it in a bed of butyl caulk. It was a big sticky mess and cutting it out was a chore. Also, the upper corner of the glass on one side had almost no clearance between it and the window frame. Either they installed it cockeyed or something is tweaked.
The stainless header/pillar trim and visors were attached with a hodgepodge of mismatched screws all thoroughly corroded in place.
The cowl beneath the wiper motor was packed with dirt and debris as was the passenger side drain area. Seems the Chrysler engineers could have come up with a better solution for draining the cowl under the wiper motor than to have it dump out on the firewall just above the gas pedal mount. While I'm not positive, I think this is the source of one of my water leaks. I can't find any rusted out areas inside the cowl.
There's a center cowl drain just above the gas pedal mount.
The heater box and evaporator cover were in really poor shape with a lots of cracked and broken fiberglass. The mounting points are also a good place for water to get in, especially given the condition of the box. The blower motor is seized.
Inside there was no shortage of surface rust on the dash frame, pedal assembly, and underside of the cowl. It'll take a lot of work to get it all cleaned up. The wiring's a mess as is the myriad of vacuum lines for the heater system. A non-AC car would be a piece of cake.
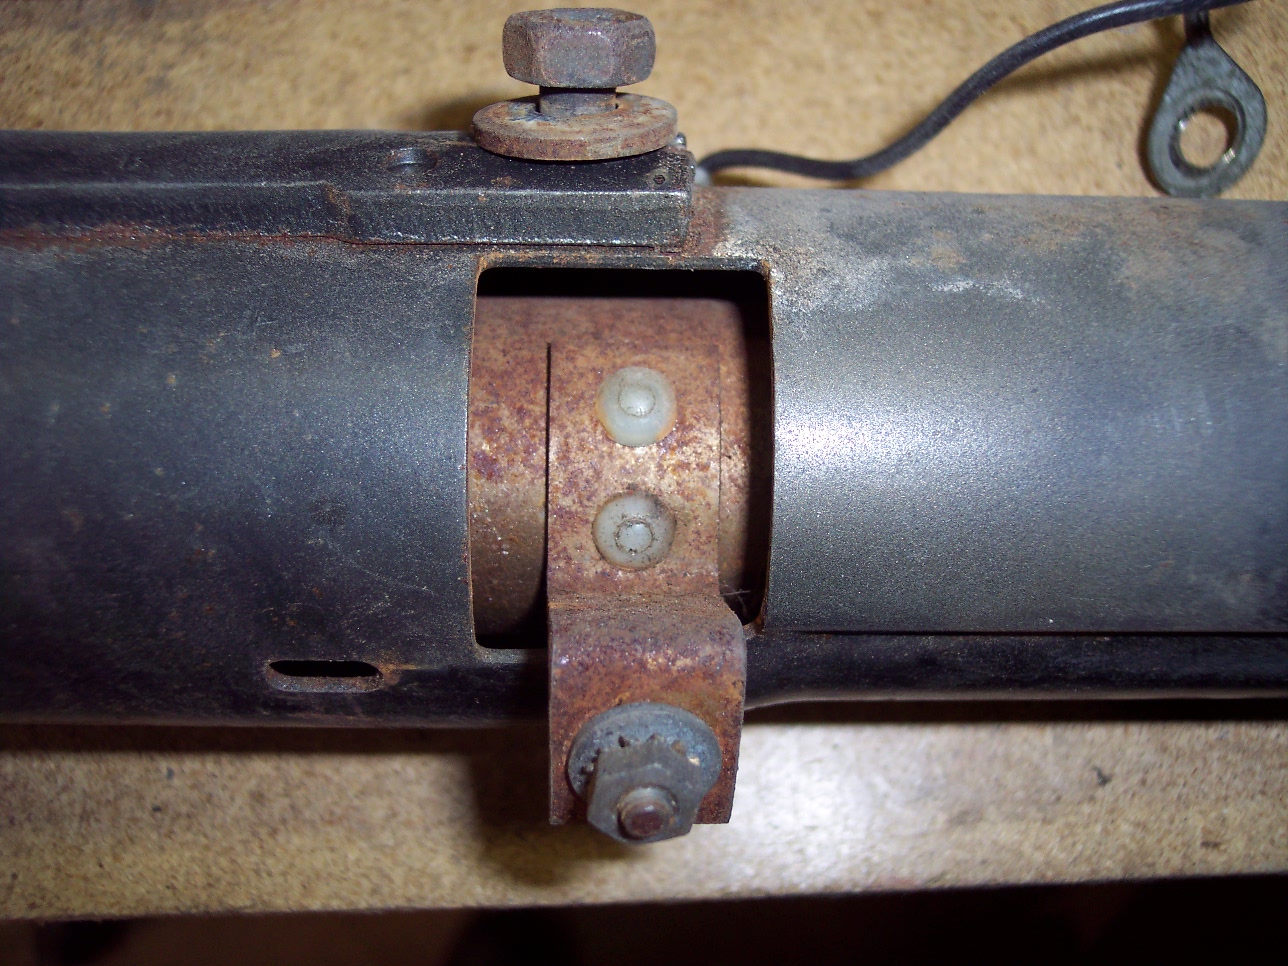
This evening we pulled engine and trans as a unit. Again, all went pretty well. There's a torque cable on the driver side mount which appears factory - certainly not homemade. The passenger side mount was broken.
Austin shows off his "guns".
Austin enjoys this kind of work - at least until he gets hungry. As soon as we had it out and the trans separated from the engine it was quitin' time for him (dinner).
"Let me show you how it's done, Dad."
Here he is at age 6 supervising the removal of the engine from the Duster. Boy, how time flies!
Friday, October 22, 2010
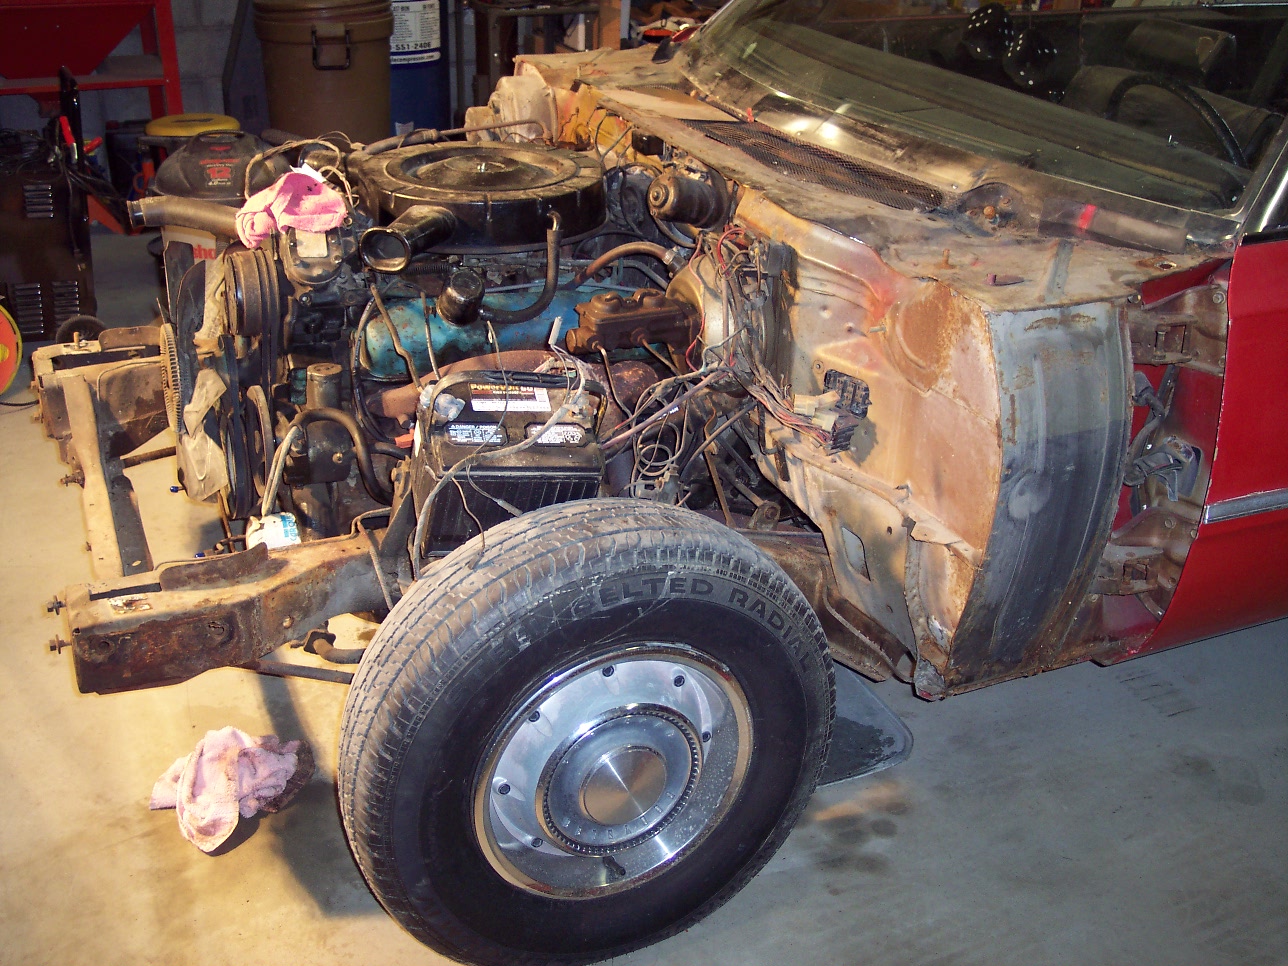
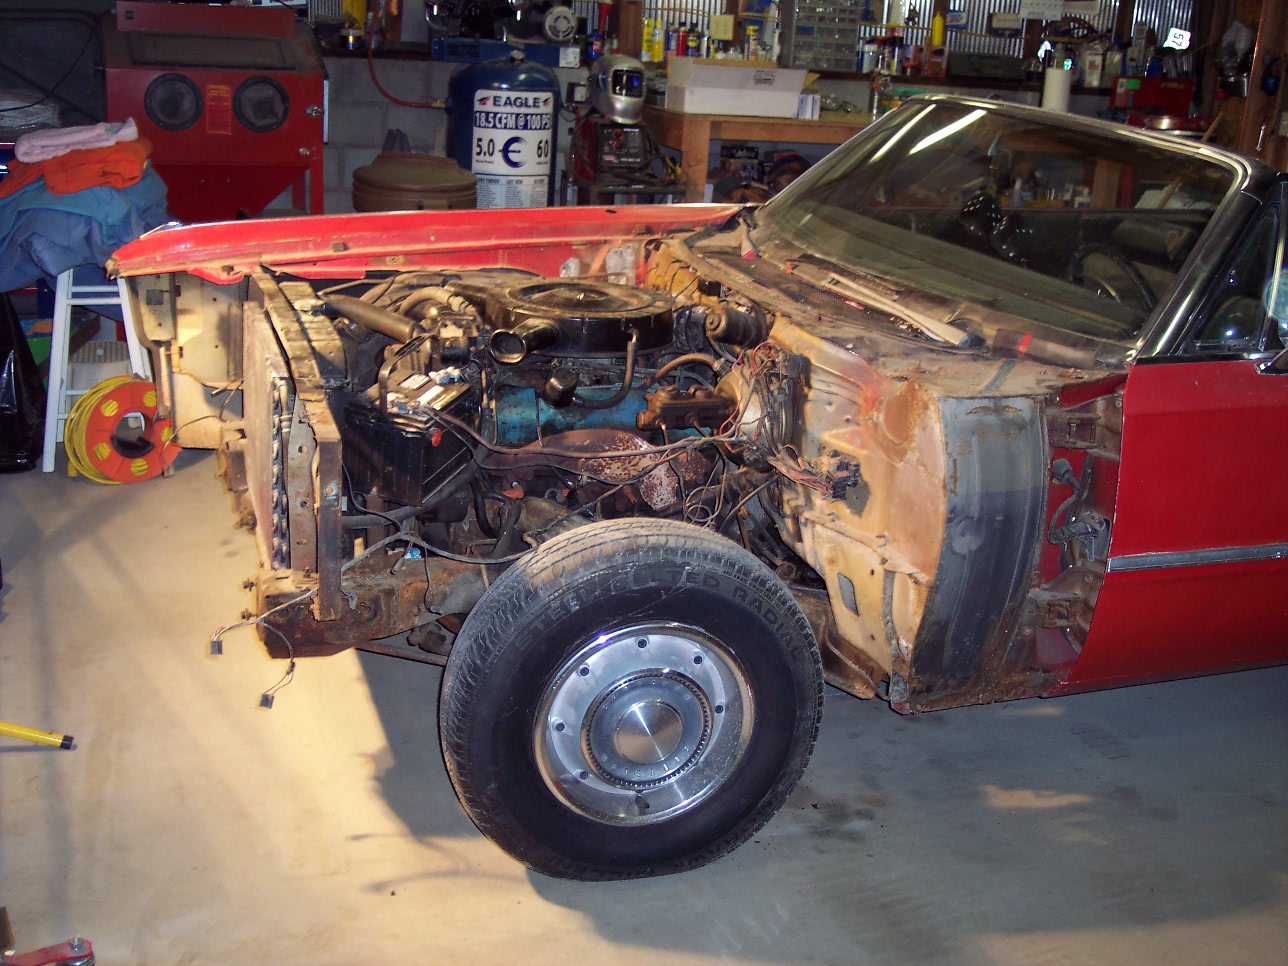
We pulled the remaining fender. This is where more "hack" repairs were discovered. Some inner fender fasteners were missing. In fact, when I went to remove the bolt for the fender brace that's buried behind the wheel opening it was gone - or at least it looked like it was. Upon closer inspection I found that someone had tack welded the brace to the mount on the cowl. Not sure why unless they simply lost the bolt and it was faster to weld it. Used a cutoff wheel on the weld to finally free the fender from the car.
My son, Austin, and I spent a couple hours pulling most of the front end off. It went a little smoother than I expected considering the corroded fasteners. The car spent who knows how many years in the Seattle area near the ocean. That salt air rusts things fast. When we first got the car I pulled the hood to make a repair and most of the bolts snapped off with little effort. No broken bolts so far on our tear down.
In the spring of 2008 I completed a 1970 Big-Block Plymouth Duster project (chronicled here) after 5 long years of blood, sweat, and too much money spent. Funny thing was, a few months after giving birth, the "postpartum" blues set in and I felt the urge to have another one - another project, that is.
This one would be my wife's. I was kind of excited at the prospect. She had always been very supportive of the hobby and helpful but had never really been hands-on - you know, grease under the fingernails and all. Yeah, this would actually be her project and she would do the work with my help. Well, she set about looking for a suitable child using the Auto Trader. We already had an A-Body and B/E Body Mopars were likely beyond our budget. She had always wanted a convertible to tool around town in and lo and behold spotted a '69 Newport ragtop a few hours away at a reasonable price. She made the calls to the seller and set a day and time to meet and check it out.
The 'ol Newport turned out to be reasonably straight but pretty rough around the edges. Someone had done a color change and even went as far as spray painting the interior black.The carpet was wet, the top wouldn't go up, there was cancer where you'd expect, some side glass missing, and wiring hanging from the dash. Hmmmmm. We probably should have walked away. Most sane people would have. But being the masochistic glutton for punishment that I am who suffers from occasional lapses in good judgement, we laid down the cash and drove it away. Wife drove the good car and my son, Austin, rode shotgun with me. We zipped up our sweatshirts and drove the 3 1/2 hours home over a mountain pass. It drove fine and we made it without incident: a testament to good old Chrysler engineering. Love these old land yachts.
That was September 2008. After doing some minor work on it and discovering how truly rough this old girl was around the edges - and with the economy going south - we ended up parking it for a couple of years.
In the Spring of 2010 I thought I might try to sell it - but I didn't try very hard. Instead I got bit by that bug to do something with it again. My wife graciously relinquished the reigns of "her project" to me. It wouldn't be a full restoration but a restomod budget build - if there is such a thing anymore. At least, that's the plan. Egad! Here we go again.
Newport comes out of borrowed storage for some sunlight
F*t bottomed girl
Ugh...!
We got the car out of borrowed storage and I began collecting some of the parts and pieces I knew it would need to look respectable again. I even found the glass I needed on Ebay, brand new. Yup, I was committed now in more ways than one.
The last hurdle was to get the Duster out of my small shop and safely tucked away to make room for this behemoth. And with that accomplished just weeks ago, here we are ready to roll up our sleeves and get some serious work done. My 13 year old son suffers from the same wrench turning madness as his old man. He'll be my partner in crime, of sorts, on this project. And, that's really cool.