Wednesday, December 29, 2010

Topcoating the firewall

Austin and I spent a couple of hours this afternoon during his Christmas break doing some odds and ends. He's a real trooper 'cause this kind of stuff is boring for a kid his age. I handed him some Eastwood Rust Encapsulator and had him topcoat the firewall and underdash area that I had previously treated with a rust converter (for mild surface rust). This will seal it and give it a uniform appearace. We're still cleaning paint out of Austin's hair.


Austin applies Eastwood Rust Encapsulator
 Meanwhile, I removed the e-brake assembly and cable, finished the resto on the AM Radio, and repaired some broken plastic tabs on a couple of the dash bezels.

AM radio ready to go back in
To repair the plastic tabs I'm trying a product I hadn't used before called, Rapid Fix. It's basically a super glue with a powder filler. It works very fast and seems to create a strong repair. We'll see how it holds up but so far I'm favorably impressed. It's similar to another product called Plasti-Fix which I used on my Duster project. I can't say yet which one I like better. You can get a better than website price on the Rapid Fix by shopping around.

In this case I created a dam with tape and then began alternately applying powder and glue to build it up. After it cured I was able to easily grind it to the shape I wanted with a 2" Roloc disc.

Rapid Fix before grinding/shaping

Saturday, December 11, 2010

Steering Column Tear-down

Decided to blow the steering column apart since I needed to get the floor mounting plate off and trace for a seal. It was fairly straightforward and actually a little simpler than the one in my Duster. 'Course, someone's been inside already and messed up the steering wheel and horn mechanism.


So what's it take to disassemble one? Not much. After removing the horn pad (which was taped on and missing parts under the pad) I simply removed the wheel nut and used a puller to remove the wheel. One screw and the turn signal lever is out. Remove a snap ring and the main shaft slides out. 3 screws and the switch comes out along with some springs and other miscellaneous parts. Drive the pin out that holds the shift lever in place. There is a set screw that secures the shift tube to the upper assembly. Once all this is off the only thing preventing the shift tube from coming out is the little shift indicator bracket.

The bracket is secured to the tube with two nylon rivets. I presume they used nylon so that in the event of a massive crash it would shear off just as the steering shaft, shift tube, and column housing are designed to collapse - rather than impale you.


I took a punch and pushed the little pins through and the bracket popped off. The nice thing is they should be reuseable.

Reuseable nylon rivet hold the shift pointer bracket to the shift tube. Once the bracket is off the tube will slide out.

A/C Heater controls

Like most stuff on this dash, the A/C Heater controls were really fubered. The vacuum switch was physically broken and my attempts to disassemble and repair it failed. It worked better than before but just didn't operate smoothly enough to reuse. If you've never been inside of one, they're pretty interesting. You can still buy them new from the local parts stores but fortunately I had one from a donor.

A guy in the neighborhood has a '71 Dodge Polara parked next to his house that he plans to demolition derby next summer. It was in pretty good shape and it's a shame, really, to waste a perfectly good car. But since he plans on gutting everything and literally throwing it away he let me salvage parts from it for free. (When he's done destroying it I'm welcome to salvage the drive train). I pulled most of the dash and the heater control has the same vacuum switch as my original. It works very smoothly so I swapped it in.

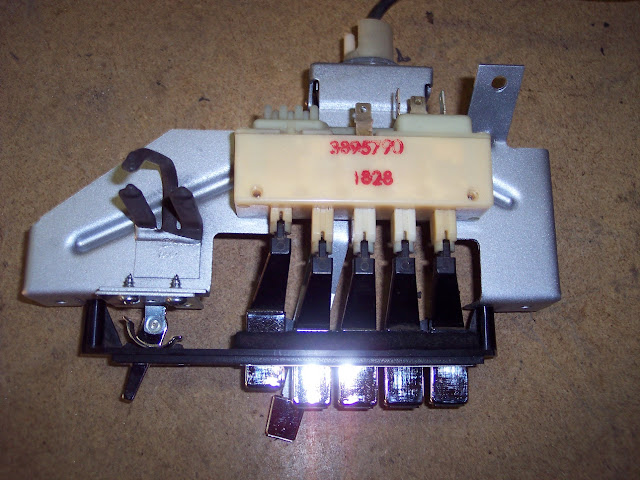
Swapped in a vacuum switch from donor

The heater blower switch was siezed. There were obvious signs of overheating and when I opened it to see if I could salvage it, it crumbled apart. Most of the wiring in the heater related circuits show signs of too much current flow at some point. I don't know what someone was doing but would explain, in part, why the dash is such a mess. In any case, since the Polara switch is different , I had to replace it with a new one.

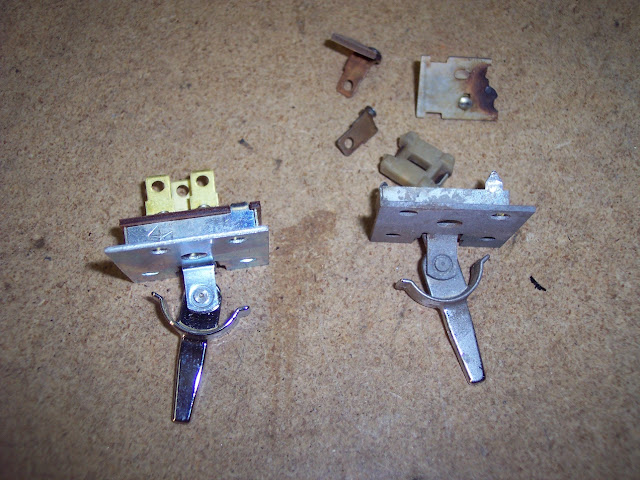
Original switch is toast

With some touch-up with a silver paint pen, the A/C Heater controls look like new again and should actually work now.